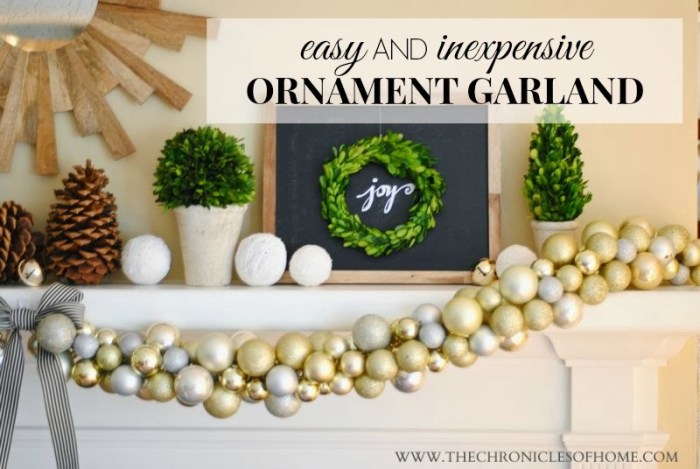
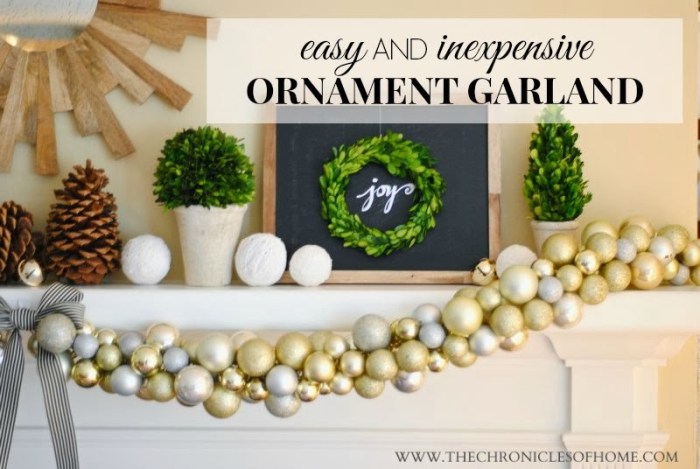
DIY ornament garlands set the stage for a festive and creative journey, inviting you to craft personalized decorations that infuse warmth and personality into any space. Whether you’re a seasoned crafter or a novice seeking a fun and rewarding project, creating your own ornament garland is a delightful way to celebrate the holidays or any special occasion.
This guide will walk you through the process of designing, crafting, and displaying your own unique ornament garlands. From selecting materials and tools to exploring various design inspirations and techniques, you’ll discover a wealth of ideas and tips to bring your vision to life.
Adding Personal Touches to DIY Ornament Garlands

Adding personal touches to your DIY ornament garland is a fantastic way to make it truly unique and special. Whether you’re decorating for a holiday, a birthday, or simply adding some charm to your home, there are countless ways to personalize your garland and make it reflect your individual style.
Incorporating Family Photos and Mementos
Adding family photos or meaningful trinkets to your ornament garland can make it a cherished keepsake. This is a great way to create a truly personalized and sentimental piece of decor.
- Photo Ornaments: You can easily create photo ornaments using clear plastic ornaments. Simply insert a small, printed photo into the ornament and seal it with glue or tape. You can also find pre-made photo ornaments online or at craft stores.
- Miniature Mementos: Incorporate small, meaningful trinkets like buttons, beads, or small charms that hold special significance. For example, you could use buttons from a favorite shirt or a small charm representing a special hobby.
- Personalized Messages: Write short messages or quotes on small paper or cardstock and attach them to the ornaments using ribbon or twine. You could include a special date, a loved one’s name, or a meaningful quote that resonates with you.
Adding Natural Elements
Incorporating natural elements like dried flowers, leaves, or branches can bring a touch of nature and rustic charm to your ornament garland. This is a beautiful way to add texture and color, especially for a fall or winter theme.
- Dried Flowers: Use dried flowers like lavender, eucalyptus, or baby’s breath to create a delicate and fragrant garland. Attach them to the ornaments using wire or twine.
- Dried Leaves: Gather colorful autumn leaves and attach them to the ornaments using glue or tape. You can also create small wreaths or clusters of leaves to add to the garland.
- Twigs and Branches: Incorporate small twigs or branches into the garland for a natural and rustic look. You can use them to create a base for the ornaments or simply weave them into the garland for added texture.
Creating Unique Textures and Patterns
Experimenting with different textures and patterns can create a truly unique and visually interesting ornament garland. You can mix and match materials, colors, and shapes to achieve a one-of-a-kind look.
- Mix and Match Materials: Combine different materials like wood, metal, glass, and fabric to create a multi-dimensional garland. For example, you could use wooden ornaments, metal beads, glass baubles, and fabric scraps.
- Play with Color: Create a color scheme using different shades of the same color or complementary colors. You can also incorporate metallic accents for a touch of sparkle.
- Geometric Patterns: Use ornaments with geometric shapes like circles, squares, or triangles to create a modern and minimalist look. You can also incorporate patterns like stripes or polka dots into the garland.
DIY Ornament Garland Tips and Tricks

Creating DIY ornament garlands can be a fun and rewarding craft project. However, there are a few tips and tricks that can help you achieve the best results and avoid common pitfalls. This section will guide you through some helpful tips and tricks for working with different materials and techniques, addressing common challenges, and offering advice on storing and preserving your DIY ornament garlands for future use.
Working with Different Materials
Working with different materials requires specific approaches to ensure successful and long-lasting ornament garlands. Here are some tips for working with various materials:
- Paper Ornaments: Paper ornaments are lightweight and versatile. To prevent them from becoming fragile, use cardstock or heavier paper. You can also reinforce them by adding a layer of clear contact paper to the back of each ornament.
- Fabric Ornaments: Fabric ornaments can be sewn, glued, or tied together. To prevent fraying, use fabric glue or fray-check on the edges of the fabric. For a more polished look, consider using a sewing machine to stitch the fabric pieces together.
- Wooden Ornaments: Wooden ornaments can be painted, stained, or left natural. If you are painting them, use acrylic paint as it dries quickly and adheres well to wood. To prevent the paint from chipping, apply a sealant after painting.
- Plastic Ornaments: Plastic ornaments are durable and can be decorated with paint, markers, glitter, or other embellishments. When using paint, make sure it is specifically designed for plastic to ensure proper adhesion. You can also use adhesive-backed vinyl to create custom designs.
Overcoming Common Challenges
Creating DIY ornament garlands can present some common challenges. Here are some solutions to overcome them:
- Uneven Spacing: To ensure consistent spacing between ornaments, use a measuring tape or a ruler to mark the desired distance on the garland string. You can also use a template or a stencil to help you achieve even spacing.
- Fragile Ornaments: For fragile ornaments, consider using a stronger string or wire for the garland. You can also add extra support by tying a small loop of ribbon or thread around the top of each ornament before attaching it to the garland.
- Loose Ornaments: To prevent ornaments from slipping or falling off the garland, use a strong glue or a knot to secure them in place. You can also use a beading wire or a wire that is designed for crafting to create a more secure garland.
Storing and Preserving DIY Ornament Garlands
Proper storage and preservation are crucial to ensure your DIY ornament garlands last for years to come. Here are some tips for storing and preserving your garlands:
- Store in a Cool, Dry Place: Avoid storing your garlands in areas that are exposed to direct sunlight, moisture, or extreme temperatures. These conditions can cause the ornaments to fade, warp, or deteriorate.
- Use Acid-Free Paper or Tissue Paper: Wrap your garlands in acid-free paper or tissue paper to protect them from dust and damage. Acid-free materials are ideal for preserving delicate items and preventing discoloration.
- Avoid Using Plastic Bags: Plastic bags can trap moisture and cause your garlands to become moldy or mildew. Use breathable fabric storage containers or boxes instead.
With a little creativity and effort, you can create stunning DIY ornament garlands that add a touch of magic to your home, parties, or special events. So, gather your supplies, embrace your imagination, and embark on a journey of festive DIY crafting!
DIY ornament garlands are a fantastic way to add a festive touch to any space. You can use a variety of materials, from classic glass ornaments to whimsical handmade creations. For a truly unique look, try incorporating elements inspired by a mad hatter hat DIY project. Think colorful ribbons, quirky buttons, and even miniature teacups! With a little creativity, your DIY ornament garland will be a conversation starter for years to come.

