AutoCAD Civil 3D is, like, the ultimate tool for civil engineers, right? It’s not just about drawing lines; it’s about designing entire worlds – from sprawling highways to intricate drainage systems. This powerhouse software lets you model complex surfaces, design corridors, and even analyze the hydraulics of your projects. Think of it as your digital sandbox for building the infrastructure of tomorrow, complete with all the bells and whistles you could ever need.
We’re diving deep into the core functionalities, from mastering the interface and creating surfaces to tackling earthwork calculations and integrating GIS data. We’ll cover essential workflows, helpful tips, and even some sneaky automation tricks to supercharge your design process. Get ready to level up your Civil 3D game!
AutoCAD Civil 3D Interface and Features
AutoCAD Civil 3D boasts a powerful and customizable interface designed for efficient civil engineering workflows. Its ribbon-based layout, similar to other Autodesk products, provides easy access to a vast array of tools and commands. Understanding the interface and its features is crucial for maximizing productivity. This section will detail key aspects of the Civil 3D interface and provide a practical workflow example.
Key Features of the AutoCAD Civil 3D Interface
The Civil 3D interface is highly customizable, allowing users to tailor the workspace to their specific needs and preferences. Key features include the ribbon, tool palettes, the Prospector window, and customizable toolbars. The ribbon organizes commands into logical tabs and panels, providing quick access to frequently used tools. Tool palettes offer specialized collections of commands related to specific tasks, such as surface creation or alignment design.
The Prospector window acts as a central project navigator, allowing users to manage and organize all aspects of their drawing, from alignments and surfaces to parcels and pipes. Customizable toolbars allow users to create shortcuts for their most frequently used commands. These features, combined with the familiar AutoCAD drawing environment, provide a powerful and intuitive platform for civil engineering design.
Creating a New Drawing in AutoCAD Civil 3D
Creating a new drawing in Civil 3D involves selecting a template appropriate for the project type. This ensures the drawing starts with the necessary settings and configurations. Upon launching Civil 3D, you’ll typically see a selection of templates, often categorized by discipline (e.g., Land Development, Transportation). Selecting a template automatically sets up the drawing environment with predefined layers, styles, and settings.
After selecting a template and specifying a file name and location, the new drawing is created, ready for data input and design work. The chosen template significantly impacts the workflow, so choosing the correct one is a critical first step.
Navigating the Tool Palettes
The tool palettes in Civil 3D are context-sensitive, meaning the available tools change based on the current task or selected object. To navigate them effectively, understand that each palette typically groups commands thematically. For instance, the “Grading” palette contains tools for creating and manipulating grading surfaces, while the “Pipe Networks” palette contains tools for designing and analyzing pipe networks.
To access tool palettes, locate the relevant tab on the ribbon (e.g., “Home,” “Analyze,” “Annotate”). Click the small arrow in the lower right corner of a panel to open the associated palette. The palettes can be docked, undocked, or even customized to suit individual preferences. Efficient palette navigation speeds up the design process considerably.
Sample Workflow for a Typical Civil 3D Project
Let’s consider a simple site grading project. A typical workflow might involve these steps:
1. Data Import
Import survey data (points, lines) into Civil 3D.
2. Surface Creation
Create a ground surface from the imported data.
3. Alignment Creation
Define alignments (roads, pathways) using the alignment tools.
4. Grading Design
Design the grading using the surface and alignment data, potentially employing grading tools to create cut and fill volumes.
5. Annotation and Documentation
Add annotations (labels, dimensions, etc.) and create plan sheets for documentation.
6. Volume Calculations
Calculate cut and fill volumes to estimate earthwork quantities.
7. Export
Export the final design data in various formats for use in other software or for sharing with stakeholders. This process showcases how different Civil 3D features integrate seamlessly for a complete design workflow. Different project types will naturally require modifications to this workflow.
Surface Modeling in AutoCAD Civil 3D

Surface modeling in Civil 3D is a crucial aspect of any project involving terrain analysis and design. It allows engineers and surveyors to create accurate digital representations of the earth’s surface, enabling efficient analysis and design of infrastructure projects like roads, pipelines, and land development. Mastering surface creation and manipulation is key to leveraging the power of Civil 3D.
Creating and editing surfaces in Civil 3D involves a multi-step process. First, you’ll need to gather your data, which typically includes point clouds, survey data, and existing digital elevation models (DEMs). This data is then imported into Civil 3D and used to build the surface. The software offers a range of tools for manipulating the surface after creation, allowing for refinement and adjustments based on design needs or updated survey information.
These tools include adding or removing breaklines, editing individual points, and smoothing or refining the surface’s overall appearance. Finally, the completed surface can be used for analysis and design, providing critical information for grading, volume calculations, and other essential project tasks.
Surface Creation Methods
Civil 3D provides several methods for creating surfaces, each with its own advantages and disadvantages depending on the data available and the project’s complexity. Choosing the right method ensures efficiency and accuracy.
The most common methods include creating surfaces from point files, TINs (Triangulated Irregular Networks), and importing existing surfaces from other software. Using point files is ideal when you have a large dataset of individual points representing elevations. TINs provide a more structured approach, connecting points to form triangles that represent the surface. Importing existing surfaces streamlines the workflow when you’re working with data already in a surface format.
Each method offers different levels of control and precision; selecting the appropriate method depends on the project’s specific needs and the quality of the input data.
Breakline Use in Surface Modeling, Autocad civil 3d
Breaklines are essential for controlling the surface’s shape and accurately representing features like roads, streams, and building edges. They force the surface to follow a specific path, preventing unwanted smoothing across significant elevation changes.
Breaklines are lines that define a sharp change in elevation. They are incorporated into the surface creation process to ensure that the surface accurately reflects the terrain. For example, a breakline might be used to represent the edge of a cliff or a sudden drop in elevation. Without breaklines, the surface might smooth over these features, leading to inaccurate representations and potentially flawed design decisions.
The placement and type of breaklines (e.g., hard breaklines, soft breaklines) are crucial for obtaining accurate surface modeling.
Optimizing Surface Performance
Large and complex surfaces can impact Civil 3D’s performance. Employing optimization strategies is crucial for maintaining a smooth and efficient workflow.
Several techniques can significantly improve surface performance. These include simplifying the surface by reducing the number of points or triangles, using appropriate surface creation methods based on data size, and employing the “Simplify Surface” command to reduce the data density. Regularly purging unnecessary data and avoiding overly complex surface definitions also contribute to a more responsive Civil 3D environment.
For instance, if working with a large point cloud, consider creating a simplified surface for initial design tasks and then refining it later with a higher-resolution surface for detailed analysis.
Corridors and Alignment Design
Corridor modeling in AutoCAD Civil 3D is a powerful tool for designing linear infrastructure projects like highways, railroads, and pipelines. It allows engineers to efficiently model the complex geometry and features associated with these projects, streamlining the design process and improving accuracy. Essentially, a corridor is a 3D representation of the project’s footprint, including all its components like roadways, ditches, slopes, and other elements.
This approach allows for comprehensive design analysis and coordination across different disciplines.
Corridor Modeling Explained
Corridor modeling involves creating a central alignment, which defines the primary path of the infrastructure. Then, various components, such as cross sections, are attached to this alignment. These cross sections define the shape and dimensions of the corridor at specific points along the alignment. Civil 3D automatically generates the 3D model by interpolating between these cross sections, creating a complete representation of the project’s geometry.
The software also handles the complex interactions between different corridor components, ensuring geometric consistency and facilitating design changes. Modifications to one component automatically update related elements, reducing errors and saving time.
Highway Corridor Design Example
Let’s design a simple two-lane highway corridor. The alignment will be a straight line for simplicity. We’ll define a typical cross section including two 12-foot-wide traffic lanes, two 4-foot-wide shoulders, and a 6-foot-wide median. The cross section will also incorporate ditches on either side, with slopes to manage drainage. The corridor’s design will also include a specific design speed to determine the superelevation (banking) of the roadway on curves (though this example is a straight alignment so superelevation isn’t necessary here).
The corridor’s length would be determined by the project requirements. Material quantities for earthwork can be easily calculated from this model. Furthermore, the corridor model will account for vertical alignment, ensuring appropriate grades for drainage and driver comfort.
Key Parameters in Corridor Design
Several key parameters influence corridor design. These include the alignment geometry (horizontal and vertical curves), the cross-section geometry (lane widths, shoulder widths, slopes), design speed, and the various corridor components (e.g., daylight lines, pavement design, drainage structures). Accurate input of these parameters is crucial for a successful design. Errors in these parameters can lead to significant issues during construction.
For example, an incorrect slope could lead to drainage problems, while inadequate lane width could compromise safety.
Advantages and Disadvantages of Corridor Components
Different corridor components offer various advantages and disadvantages. For example, using a daylight line component helps in visualizing and managing earthwork. However, its precise modeling requires careful attention to the design parameters. Similarly, including a specific pavement design component improves the accuracy of material estimations, but adds complexity to the model. The use of specific drainage structures, like culverts, improves the model’s realism but requires additional data and expertise.
Choosing the appropriate components depends on the project’s complexity and the level of detail required. A simpler project might require fewer components, while a more complex one might benefit from a more comprehensive model including all relevant components.
Drainage Design in AutoCAD Civil 3D
AutoCAD Civil 3D offers robust tools for designing efficient and effective drainage systems. This section will explore the process of designing storm sewer systems within the software, focusing on creating and analyzing pipe networks and utilizing its hydraulic analysis capabilities. We’ll walk through a practical example of designing a drainage system for a small residential area.
Storm Sewer System Design Process
Designing a storm sewer system involves several key steps, from initial data collection to final design verification. It begins with understanding the site’s topography, rainfall patterns, and the expected runoff volume. This information is then used to develop a network of pipes, channels, and other drainage structures capable of safely conveying stormwater away from the area. Civil 3D provides tools to model this entire process, from conceptual design to detailed plans and specifications.
Accurate modeling is crucial to ensure the system’s effectiveness and prevent potential flooding or erosion.
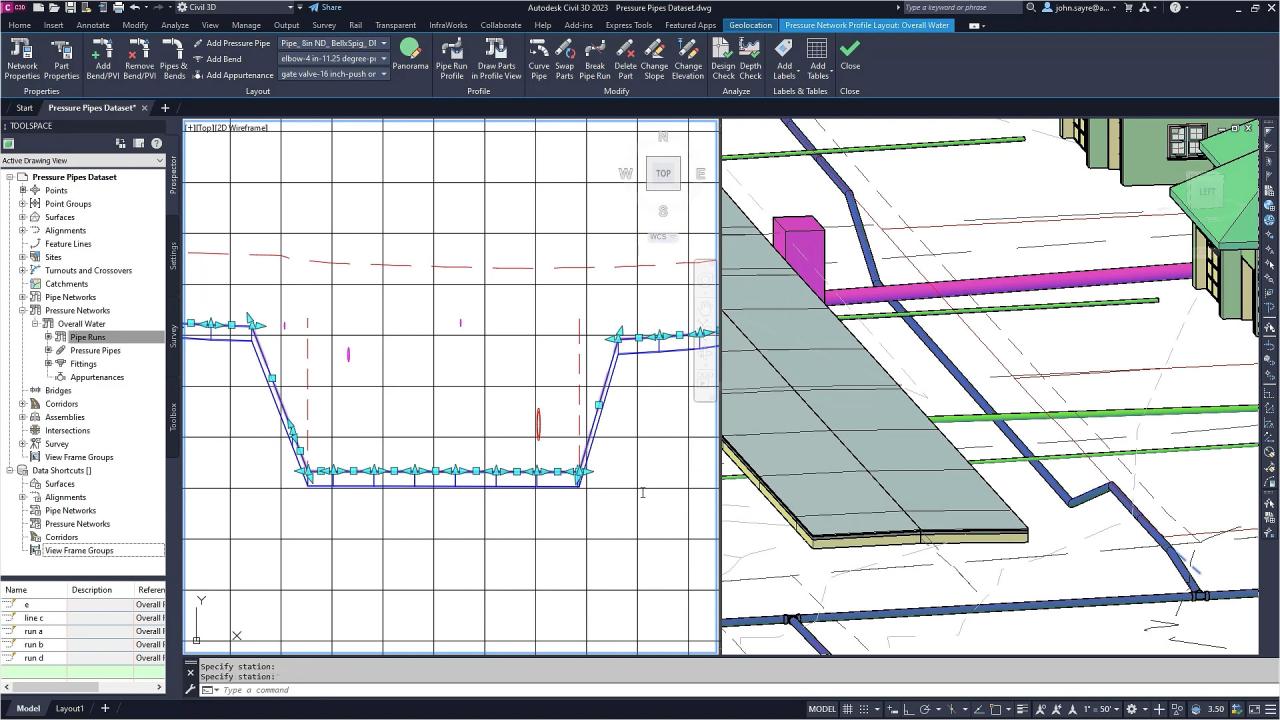
Creating and Analyzing Pipe Networks
Creating a pipe network in Civil 3D involves defining pipe properties (diameter, material, slope), connecting them to form a network, and then analyzing the hydraulic performance. The software allows for the creation of complex networks with various components like manholes, inlets, and outfalls.
- Define Pipe Properties: Begin by specifying the diameter, material (e.g., PVC, concrete), roughness coefficient (Manning’s n), and invert elevations for each pipe segment. This data directly impacts the hydraulic calculations.
- Create the Pipe Network: Use Civil 3D’s tools to draw the pipes, connecting them at nodes representing manholes or other structures. Accurate placement and elevation are critical for accurate analysis.
- Define Structures: Add manholes, inlets, and outfalls to the network, specifying their locations and elevations. These structures are crucial for managing flow and ensuring proper system operation.
- Run Hydraulic Analysis: Civil 3D performs hydraulic calculations based on the defined pipe properties and the inflow from the contributing areas. The results will show flow velocities, depths, and pressures at various points within the network. This helps ensure that the design meets hydraulic criteria and avoids issues like excessive velocities or surcharging.
- Review and Iterate: Review the analysis results and adjust pipe sizes, slopes, or other parameters as needed to meet design criteria. This iterative process ensures an optimal and safe design.
Hydraulic Analysis Tools
Civil 3D provides several tools for hydraulic analysis, including the ability to model various flow regimes (e.g., open channel flow, pressure flow), account for different roughness coefficients, and consider various inflow scenarios. The software allows for steady-state and dynamic simulations, enabling a comprehensive understanding of the system’s performance under various conditions. The results are typically presented in tables and graphical formats, making it easy to interpret the data and make informed design decisions.
For example, the software can calculate the head loss in each pipe segment using the Manning’s equation:
V = (R2/3
S1/2) / n
where:
- V = flow velocity
- R = hydraulic radius
- S = slope
- n = Manning’s roughness coefficient
Drainage System Design for a Small Residential Area
This table Artikels the steps for designing a drainage system for a small residential area using AutoCAD Civil 3D.
| Step | Task | Civil 3D Tools | Considerations |
|---|---|---|---|
| 1 | Site Data Collection and Import | Import survey data (points, surfaces), define boundaries. | Accuracy of data is crucial for accurate modeling. |
| 2 | Surface Modeling | Create a surface model representing the site topography. | Ensure accurate representation of existing ground elevations. |
| 3 | Drainage Area Delineation | Define drainage areas using watershed analysis tools. | Accurate delineation is critical for determining runoff volumes. |
| 4 | Pipe Network Design | Create pipe network using pipe and structure tools, considering slopes and capacities. | Meet minimum and maximum velocity criteria, consider pipe material and lifespan. |
| 5 | Hydraulic Analysis | Run hydraulic analysis to check flow velocities, depths, and pressures. | Ensure the system can handle peak flows during storm events. |
| 6 | Design Optimization | Iteratively adjust pipe sizes and slopes to meet design criteria. | Balance cost-effectiveness with system performance. |
| 7 | Documentation | Generate plans, sections, and reports for construction. | Detailed documentation is essential for accurate construction. |
Grading and Earthwork Calculations

Grading and earthwork calculations are crucial in Civil 3D projects, impacting cost, time, and overall project success. Accurate earthwork estimations are essential for bidding, scheduling, and resource allocation. This section details the methods used in Civil 3D to perform these calculations, generate reports, and create grading plans.Earthwork calculations in Civil 3D rely heavily on surface models. These models represent the existing ground and the proposed finished grade.
By comparing these surfaces, Civil 3D can automatically calculate cut and fill volumes. The accuracy of these calculations directly depends on the quality and resolution of the surface data. Inaccurate or incomplete surface data will lead to inaccurate earthwork estimations.
Volume Calculations Methods
Civil 3D offers several methods for calculating earthwork volumes. The most common is the volume comparison between two surfaces. This involves defining a “design surface” representing the finished grade and an “existing surface” representing the current ground conditions. The software then calculates the volume difference between these two surfaces, indicating cut (material removed) and fill (material added) quantities.
Other methods, such as the use of TIN (Triangulated Irregular Network) models, provide alternative approaches to volume calculation, offering different levels of accuracy depending on the project’s complexity and data density. The selection of the appropriate method depends on the project requirements and data availability.
Generating Volume Reports
Once the volume calculations are complete, Civil 3D allows users to generate comprehensive reports. These reports typically include total cut and fill volumes, net volume (the difference between cut and fill), and potentially a breakdown of volumes by area or other specified criteria. Users can customize these reports to include additional information such as material type or haul distances, enhancing the project’s management capabilities.
These reports are critical for accurate cost estimation and project planning. A typical report might show a total cut volume of 10,000 cubic yards and a total fill volume of 8,000 cubic yards, resulting in a net cut of 2,000 cubic yards.
Creating Grading Plans
Grading plans visually represent the proposed changes in ground elevation. In Civil 3D, these plans are created by manipulating the design surface to achieve the desired grades. This often involves adjusting spot elevations, modifying contours, and using grading tools to create smooth transitions between different areas. The software allows for iterative adjustments, enabling designers to refine the grading plan until it meets the project’s specifications and minimizes earthwork costs.
A well-designed grading plan ensures proper drainage and minimizes environmental impact. Consider a scenario where a sloping site requires terracing to create level building pads. The grading plan would illustrate the precise cuts and fills needed to achieve these level areas.
Optimizing Earthwork Quantities
Optimizing earthwork quantities aims to minimize the overall volume of cut and fill. This translates to reduced costs, improved efficiency, and less environmental disruption. Strategies for optimization include adjusting the design surface to balance cut and fill volumes, strategically placing borrow and waste areas, and utilizing mass haul diagrams to plan efficient material movement. Mass haul diagrams visually represent the movement of earth materials, helping to identify the most cost-effective hauling routes.
By minimizing the distance materials need to be transported, project costs can be significantly reduced. For example, strategically placing a building to minimize cut in one area and maximize fill in another can significantly reduce overall earthwork quantities.
Point Clouds and Data Import
Point cloud data, essentially a massive collection of 3D points representing a real-world object or environment, is increasingly crucial in Civil 3D projects. Its ability to capture intricate details makes it invaluable for tasks ranging from site surveying to as-built modeling. Importing and effectively using this data is a key skill for any Civil 3D user.Point cloud data can be imported into Civil 3D from various sources, including laser scanners, drones, and photogrammetry software.
The process involves specifying the file type (like .las, .xyz, or .rcs) and defining the coordinate system to ensure accurate georeferencing. Civil 3D offers tools to manage the imported data, allowing for filtering, classification, and visualization to streamline workflow and improve efficiency.
Point Cloud Data Import Process
Importing point cloud data into Civil 3D typically involves navigating to the “Import” command within the Civil 3D ribbon. The user then selects the point cloud file, specifies the coordinate system (often a projected coordinate system relevant to the project location), and chooses import options such as scaling and units. After successful import, the point cloud data appears in the Civil 3D drawing, ready for further processing and analysis.
The software handles large files efficiently, often leveraging features like progressive display to show the data as it loads, preventing a lengthy wait time.
Utilizing Point Clouds for Surface Creation
Point cloud data forms the foundation for creating highly accurate surfaces in Civil 3D. This is achieved by using the “Create Surface from Point Cloud” command. The software allows users to select the imported point cloud data and define parameters like breaklines and surface boundaries. Civil 3D then interpolates a surface model from the point cloud data, generating a digital representation of the terrain or other features.
This surface can then be used for various analyses, including volume calculations and grading design. For example, a point cloud from a construction site could be used to create a surface model representing the existing ground conditions, allowing for accurate earthwork calculations.
Challenges of Working with Large Point Cloud Datasets
Working with extremely large point cloud datasets presents unique challenges. Processing and visualizing massive amounts of data can strain system resources, potentially leading to slow performance or even crashes. Efficient data management strategies, such as using Civil 3D’s data filtering and selection tools, are essential to mitigate these issues. For instance, filtering out points outside a specific area of interest can significantly reduce processing time and improve performance.
Another challenge involves the potential for errors in the point cloud data itself, requiring careful data cleaning and validation before surface creation. Inconsistent data density or outliers can significantly affect the accuracy of the resulting surface.
Creating a Surface from a Point Cloud: A Step-by-Step Guide
- Import the point cloud data into Civil 3D, ensuring correct coordinate system and units.
- Select the imported point cloud data in the drawing.
- Access the “Create Surface” command from the Civil 3D ribbon.
- Choose “From Point Cloud” as the surface creation method.
- Specify the point cloud data as the input source.
- Define the surface boundaries and any necessary breaklines.
- Select the appropriate interpolation method (e.g., TIN or grid).
- Review and adjust the surface parameters as needed.
- Create the surface. Civil 3D will then generate the surface model from the point cloud data.
AutoCAD Civil 3D and GIS Integration
AutoCAD Civil 3D’s power significantly expands when integrated with Geographic Information System (GIS) software. This integration allows for the seamless flow of geospatial data, enriching the design process with real-world context and improving accuracy and efficiency. The ability to leverage existing GIS datasets eliminates redundant data entry and allows for better informed decision-making throughout the project lifecycle.GIS data provides crucial context for Civil 3D projects.
Imagine designing a new highway without knowing the location of existing utilities, property lines, or environmental features. GIS integration avoids this by providing a comprehensive spatial understanding of the project site and its surroundings. This integration streamlines workflows, improves collaboration, and ultimately results in better-designed and more sustainable infrastructure.
Importing and Exporting Geospatial Data
The process of exchanging data between AutoCAD Civil 3D and GIS software typically involves common file formats. Shapefiles (.shp), GeoJSON (.geojson), and DWG files are frequently used for transferring point, line, and polygon data. AutoCAD Civil 3D directly supports importing and exporting these formats, making the data exchange relatively straightforward. More complex data transfers might involve using specialized tools or plugins depending on the specific GIS software used.
For instance, a direct connection to an ArcGIS server might be established to access and update data dynamically. The choice of method depends on the complexity of the data and the desired level of integration.
Benefits of Using GIS Data in Civil 3D Projects
Incorporating GIS data offers numerous advantages. First, it provides a comprehensive understanding of the project site’s context, including topography, land use, and existing infrastructure. This contextual information helps engineers make informed decisions about alignment, grading, and drainage design. Second, it enhances accuracy by minimizing errors associated with manual data entry. GIS data is often more accurate and up-to-date than manually collected data.
Third, it facilitates collaboration by providing a common spatial framework for different project stakeholders. Engineers, surveyors, and other professionals can access and share the same GIS data, improving communication and reducing conflicts. Finally, it supports sustainable design by allowing engineers to consider environmental factors, such as wetlands and protected areas, during the design process. This leads to environmentally responsible and sustainable infrastructure development.
Workflow for Integrating GIS Data into a Civil 3D Project
A typical workflow begins with identifying the necessary GIS data. This might include things like base maps, parcel data, utility lines, and elevation models. Next, the data is acquired, often through a GIS database or online mapping services. Then, the data is imported into AutoCAD Civil 3D using the appropriate import tools. The imported GIS data is then integrated into the Civil 3D model, often used as a base map or as a reference layer for alignment, grading, and drainage design.
Finally, any necessary analysis is performed, and the design is finalized. Throughout the process, careful attention should be paid to data transformations and coordinate systems to ensure accuracy and consistency. For example, converting data from a state plane coordinate system to a project-specific coordinate system is a crucial step to avoid errors. This workflow ensures seamless integration and avoids conflicts.
A well-defined workflow ensures that the GIS data is properly integrated and used effectively throughout the design process.
Customization and Automation

Automating tasks and customizing your Civil 3D environment is key to boosting productivity and tailoring the software to your specific needs. This section will explore the creation of custom tool palettes, the power of AutoLISP and Dynamo for automation, and best practices for managing your custom creations. Efficient workflow is directly tied to how well you leverage these tools.
By streamlining repetitive actions and creating personalized interfaces, you can significantly reduce design time and minimize errors. This leads to a more efficient and enjoyable experience working within Civil 3D.
Creating Custom Tool Palettes
Custom tool palettes provide a convenient way to organize frequently used commands and tools. This allows for quick access to your most-needed functions, improving workflow efficiency. To create a custom palette, you’ll navigate to the Customize menu, select Tool Palettes, and then create a new palette. You can then drag and drop commands from the existing tool palettes or add external commands.
Consider grouping related commands logically for ease of use. For example, you might create a palette specifically for surface manipulation tools, another for corridor design, and another for your most frequently used annotation commands. Careful organization minimizes search time and enhances the overall user experience.
AutoLISP and Dynamo for Automation
AutoLISP and Dynamo offer powerful scripting capabilities for automating repetitive tasks within Civil 3D. AutoLISP, a dialect of Lisp, has been a long-standing tool for AutoCAD customization, offering a text-based approach to scripting. Dynamo, a visual programming environment, provides a node-based interface, making it more accessible to users less familiar with traditional programming. Both can automate processes like creating blocks, generating reports, or performing complex calculations.
For instance, AutoLISP could be used to automate the creation of a series of spot elevations based on a given surface, while Dynamo might be used to create a complex grading model based on a series of parameters.
Examples of Automation Improving Workflow Efficiency
Imagine needing to create hundreds of similar labels for a large-scale project. Manually creating each label would be time-consuming and prone to errors. Using AutoLISP or Dynamo, you could automate the process, significantly reducing the time required and ensuring consistency across all labels. Similarly, consider the task of generating cross-sections along an alignment. Automating this process eliminates manual input, reduces errors, and allows for quick generation of multiple cross-sections with different parameters.
Another example is automating the extraction of data from a surface to create a report detailing cut and fill volumes. This automation saves considerable time and reduces the potential for manual calculation errors.
Best Practices for Managing Custom Tools and Scripts
Proper organization is vital for maintaining and reusing your custom tools and scripts. Use a clear naming convention for your palettes and scripts, documenting their purpose and functionality. Store your custom tools in a well-organized folder structure, allowing for easy access and retrieval. Version control systems, like Git, can be used to track changes and collaborate with others on custom tools.
Regularly back up your custom tools and scripts to prevent data loss. Finally, consider using a centralized repository to share and manage custom tools within a team. This fosters collaboration and consistency across projects.
Working with Parcels and Subdivisions
AutoCAD Civil 3D offers powerful tools for managing and manipulating parcels, a crucial aspect of land surveying and subdivision planning. This section will delve into the creation, management, and legal considerations surrounding the use of these tools within the software. We’ll also walk through a practical example of subdividing a parcel.
Creating and managing parcels in Civil 3D involves defining the boundaries of a piece of land using points, lines, and curves. These boundaries can be imported from existing data or drawn directly within the software. Once created, parcels can be easily modified, merged, or split to reflect changes in ownership or development plans. Civil 3D’s parcel tools also allow for the calculation of area, perimeter, and other essential property information, automating many of the tedious tasks associated with traditional surveying methods.
Effective parcel management ensures accurate record-keeping and facilitates efficient land development processes.
Parcel Creation and Management
The process begins with defining the parcel’s boundary. This typically involves entering coordinate data for boundary points, creating lines connecting these points, and closing the polygon to form a complete boundary. Civil 3D provides tools to ensure accurate geometry and automatically calculate area and perimeter. Attributes such as ownership information, parcel ID, and zoning can then be assigned to the parcel.
Tools for editing existing parcels allow for adjustments to boundary lines, addition of easements, and merging or splitting parcels. This functionality is critical for managing land ownership and development changes accurately.
Subdivision Tools
Civil 3D’s subdivision tools enable the systematic division of a larger parcel into smaller lots. This involves creating new parcel boundaries within the existing parcel, respecting legal requirements like setbacks and easements. The software assists in maintaining accurate lot sizes and ensuring compliance with local regulations. Features such as automatic area calculations and the ability to generate reports based on the subdivision plan streamline the workflow.
These tools reduce manual calculations and drafting, leading to increased efficiency and reduced errors in the subdivision process.
Legal Implications of Using AutoCAD Civil 3D for Land Surveying
The use of AutoCAD Civil 3D for land surveying carries significant legal implications. The accuracy and reliability of the data produced are crucial for legal compliance. Any inaccuracies can lead to legal disputes and costly corrections. Surveyors must adhere to relevant professional standards and local regulations when using the software. Furthermore, proper documentation of the surveying process, including data sources and methodology, is essential for ensuring the legal defensibility of the results.
Incorrectly generated parcel boundaries or flawed calculations can have serious legal repercussions. Always ensure you are adhering to all relevant professional standards and regulations.
Step-by-Step Guide for Subdividing a Parcel
- Import Existing Data: Begin by importing the existing parcel boundary data into Civil 3D. This might be in the form of a CAD drawing, coordinate data, or a digital boundary file.
- Define Subdivision Requirements: Determine the number of lots, desired lot sizes, and any relevant setbacks or easements based on local regulations and client specifications.
- Create Subdivision Lines: Using Civil 3D’s drawing tools, create lines that divide the existing parcel into the desired number of lots, ensuring that the lines respect the predetermined requirements.
- Check for Compliance: Verify that the newly created lot boundaries comply with all applicable regulations and zoning ordinances. Civil 3D can assist in calculating lot areas and ensuring that setbacks are met.
- Create New Parcels: Use Civil 3D’s parcel creation tools to generate new parcels based on the subdivision lines. Assign appropriate attributes such as lot numbers and ownership information.
- Generate Reports: Create reports detailing the subdivision plan, including lot areas, dimensions, and other relevant information. This documentation is essential for legal and regulatory compliance.
Collaboration and Data Management: Autocad Civil 3d
Okay, so we’ve covered the cool features of Civil 3D, but let’s be real – a successful project hinges on smooth collaboration and rock-solid data management. Without a plan, even the best-designed model can become a chaotic mess. This section dives into strategies to keep your team and your data organized.Effective collaboration and data management are crucial for any Civil 3D project.
Poor data management can lead to errors, inconsistencies, and wasted time, ultimately impacting project deadlines and budgets. A well-defined strategy ensures everyone’s on the same page, working with the most up-to-date information.
Data Management Strategies
Implementing a robust data management strategy is essential for preventing conflicts and ensuring data integrity. This includes establishing clear naming conventions for files, organizing project folders logically, and regularly backing up data. Consider using a centralized data repository accessible to all team members, enabling version control and conflict resolution. For example, a well-structured folder system might include separate folders for drawings, models, data sheets, and reports, further categorized by project phases or disciplines.
This approach ensures easy retrieval and minimizes the risk of data loss or corruption.
Collaborative Workflows
Effective collaboration requires clear communication and defined roles. Establish a workflow that Artikels how team members will share data, review designs, and resolve conflicts. Utilizing cloud-based collaboration tools allows for real-time updates and easy access to project data. For instance, using a cloud-based platform like BIM 360 or similar solutions enables multiple users to concurrently access and modify the model, fostering real-time collaboration and minimizing version control issues.
Regular team meetings, with clearly defined agendas, can also help maintain communication and address any potential roadblocks.
AutoCAD Civil 3D is a seriously powerful tool for civil engineering, letting you design everything from roads to drainage systems. It’s basically a supercharged version of general CAD software, tailored specifically for the complexities of civil projects. Because of this specialization, mastering Civil 3D opens doors to some really cool career opportunities.
Version Control and Data Sharing
Version control is critical for tracking changes and reverting to previous versions if needed. Civil 3D integrates with various version control systems, allowing you to manage revisions and collaborate efficiently. Sharing data effectively involves using a combination of cloud storage and local network drives, depending on project size and security requirements. For instance, a small team might utilize a shared network drive, while larger projects might benefit from a cloud-based solution offering enhanced collaboration features and version control capabilities.
The use of a centralized data repository, such as a server or cloud storage, with appropriate access permissions ensures data integrity and prevents accidental overwrites.
Cloud Storage and Network Data Management Plan
A well-defined plan is essential for managing project data using cloud storage or a network. This involves choosing a suitable platform (e.g., BIM 360, Dropbox, SharePoint), establishing access controls and permissions, and implementing regular backups. Consider factors such as security, storage capacity, and cost when selecting a platform. For instance, for a large project with multiple team members across different locations, a cloud-based solution like BIM 360 offers robust version control, collaboration features, and secure data storage.
A smaller project with a local team might effectively utilize a shared network drive, supplemented by regular offsite backups. Regular data audits should also be performed to ensure data integrity and identify potential issues.
Last Recap
So, there you have it – a whirlwind tour of AutoCAD Civil 3D! From initial design concepts to final presentations, this software empowers you to tackle even the most ambitious projects. Mastering Civil 3D isn’t just about learning the software; it’s about unlocking your potential as a civil engineer. Remember to practice, explore, and never stop learning – the possibilities are endless!
Essential FAQs
What’s the best way to learn AutoCAD Civil 3D?
Hands-on practice is key! Combine online tutorials, official documentation, and real-world projects to solidify your skills. Consider taking a course or workshop for structured learning.
Is AutoCAD Civil 3D compatible with other software?
Absolutely! It integrates seamlessly with other Autodesk products and many GIS platforms, allowing for smooth data exchange and collaborative workflows.
How much does AutoCAD Civil 3D cost?
Licensing costs vary depending on the subscription type and features included. Check the Autodesk website for the most up-to-date pricing information.
What are some common mistakes beginners make in Civil 3D?
Not properly setting up units and coordinates is a major one. Also, forgetting to save frequently and neglecting proper data management can lead to headaches down the line.
Where can I find additional resources and support?
Autodesk’s website offers extensive documentation, tutorials, and a vibrant community forum. You can also find tons of helpful content on YouTube and other online learning platforms.